
Why you ask?
Well... it's true.. .I am a very messy person, but that's not the real reason.
The real reason is that I had happened to spot THE cutest apron ever over at Anthropologie, and since then I haven't been able to get it out of my head.
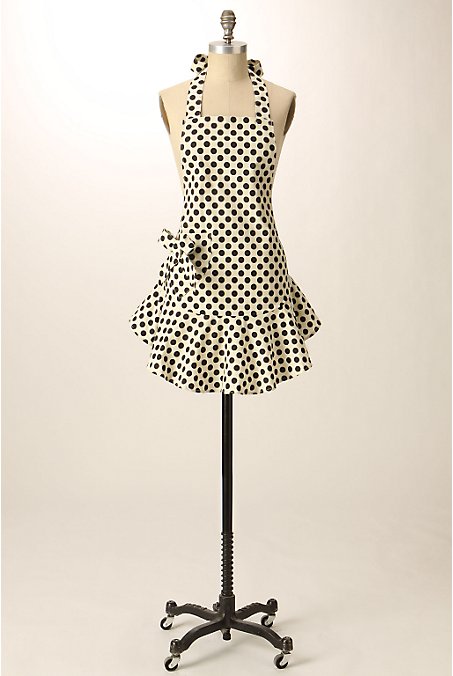
It's very 1940's housewife look, but really liked the fact that it was somewhat elegant (as elegant at an apron can get I guess), and didn't have chickens or chili peppers anywhere near it!
I especially loved the little ruffle at the bottom!
Here's how it turned out!

Note: the spoon is my sister's idea...
....she thought it would add a more 'kitcheny' feeling.
Why I listen I don't know.
So since I'm useless at sewing, I tried to make this whole process as simple as possible.
I hope this helps!
Things you'll need:

- an old apron
- material
- scissors
- chalk
- pins
- a sewing machine

1. Lay out the old apron that you'll be copying the general shape of, and iron it down the middle.

2. Fold your fabric in half, and trace around the apron, cutting a few cm's from the end (since we will later add the ruffle). Make sure that you add a good distance around the apron for the hem. This is also the time to alter the shape if you want. Since there was very little material for me to work with, I made no alterations.

3. Pin down the hem of the body and sew.

4. Cut out a long (preferably double in length) and thick band that will become your bottom ruffle.

5. Hem the edges with a sewing machine, and hand stick the top loosely. Pull against the string forming the ruffles. Pin and sew the ruffle to the bottom of the apron making sure that the ruffles are distributed evenly.

6. Cut two more strips of fabric that will become the waist ties, fold them in half and iron them. Sew them, making sure to round the tips, leaving the other end open. Turn them inside out, and sew them to the rest of the apron.

7. Follow step 6 for the neck tie. I decided to make a non adjustable neck strap, so I just used one piece of fabric.
And there you have it, a 1940's ruffled apron!

spot the cat!

body shot
So yeah, I hope you enjoyed this tutorial, and if you have any questions let me know!
Lyla

'Phew...I'm glad this is over...'


Good for you! It turned out really cute. I love polka dots and Anthropolgie. Perfect combination!
ReplyDeletehttp://www.shannonsews.blogspot.com